
Marquise Diamond Size Chart Gives MM Benchmarks
At 1 ct, 10 × 5 mm is a useful face-up reference, though individual dimensions vary. The grading report shows how a specific stone compares.
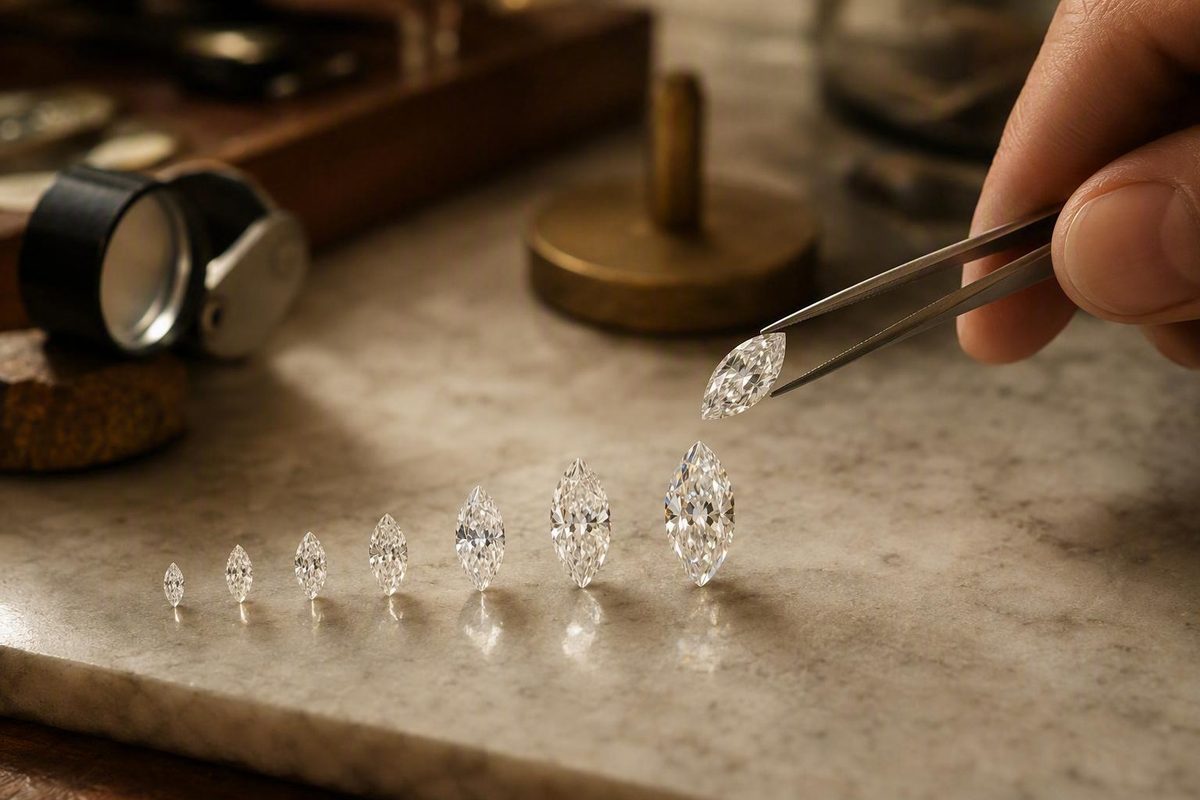
A marquise diamond’s carat weight does not determine one exact physical size. The most useful comparison combines an approximate marquise diamond size chart with the individual stone’s length, width, depth, outline, and face-up appearance.
Quick-reference marquise carat-to-millimeter chart
Important: Every conversion below is approximate, not guaranteed. Individual marquise diamonds can be longer, wider, shallower, or deeper than these benchmarks at the same carat weight.
The rows through 2.50 carats follow commonly repeated dimensions in a published marquise carat-to-millimeter chart. The 3.00–5.00 carat rows are broader syntheses of multiple tables rather than tolerance ranges produced by a single source.
| Carat weight | Typical face-up dimensions, length × width | Variation note |
|---|---|---|
| 0.25 ct | About 6 × 3 mm | Small differences are common, especially in width |
| 0.50 ct | About 8 × 4 mm | Familiar benchmark for a roughly 2:1 outline |
| 0.75 ct | About 9 × 4.5 mm | Broader or slimmer stones will differ |
| 1.00 ct | About 10 × 5 mm | Often slightly above or below either dimension |
| 1.25 ct | About 11 × 5.5 mm | Depth and shoulder shape affect the result |
| 1.50 ct | About 12 × 6 mm | Common benchmark, not an exact conversion |
| 1.75 ct | About 12.5 × 6.25 mm | Actual width varies with the outline |
| 2.00 ct | About 13 × 6.5 mm | A deep stone may face up smaller |
| 2.50 ct | About 14 × 7 mm | Usually reflects a ratio near 2.00 |
| 3.00 ct | About 14.6–15.3 × 7.0–7.7 mm | Broad 14 × 8 mm examples also appear |
| 4.00 ct | About 16.0–16.8 × 8.0–8.4 mm | Published estimates vary by model |
| 5.00 ct | About 17.0–17.8 × 8.5–9.2 mm | Treat as a broad orientation range |
One range-based table places 3.00–3.30 ct marquise diamonds at 14.60–15.30 mm long and 7.50–7.70 mm wide. It lists 4.00–4.20 ct at 16.40–16.80 × 8.20–8.40 mm and 5.00–5.25 ct at 17.40–17.80 × 8.60–9.20 mm. These are source-specific ranges, not universal limits for every stone in those weight categories. See the underlying range-based marquise size chart.
Most familiar benchmark rows describe a marquise close to twice as long as it is wide. A fixed 2.00 length-to-width model, for example, estimates:
- 1.00 ct at 10.38 × 5.19 mm
- 2.00 ct at 13.08 × 6.54 mm
- 3.00 ct at 14.98 × 7.49 mm
- 4.00 ct at 16.48 × 8.24 mm
- 5.00 ct at 17.76 × 8.88 mm
Those values come from a model that holds the ratio at 2.00, so its apparent precision should not be mistaken for a promise about an individual diamond. The assumptions behind the fixed-ratio marquise model are essential context for its numbers.
Disagreement becomes particularly noticeable from about 3 to 5 carats. Published tables place a nominal 3-carat marquise near 15 × 7 mm, 15 × 7.5 mm, or even 14 × 8 mm. Those figures should not be averaged into one supposedly correct size. They may represent different outlines, depth distributions, girdles, or modeling assumptions.
For that reason, this primary chart stops at approximately 5 carats. Extreme-size conversions have less consistent support and invite false precision. For an unusually large or distinctly proportioned stone, the grading report and face-up video are more informative than an extrapolated chart row.
Carat weight versus visible diamond size
Carat is a unit of weight, not a measurement of length, width, surface area, or finger coverage. One carat equals 0.20 grams. Face-up dimensions are the length and width, measured in millimeters, that define the outline seen from above. Depth is the third physical dimension, extending from the top of the diamond to the bottom of its pavilion. These distinctions—and the possibility that weight can be carried in depth—are explained in this comparison of carat weight and physical size.
Imagine two marquise diamonds that both weigh 1.00 carat. One has a broad face-up outline and moderate depth. The other is narrower or deeper, with more material extending below the girdle. Although the stones weigh the same, the first may look larger from above because more of its mass contributes to visible length and width.
That does not mean the shallowest diamond is automatically preferable. Greater spread can coexist with an outline or visual character that you dislike. Face-up size is one comparison factor, not a substitute for assessing the complete stone.
The marquise outline places considerable visual emphasis along its length. Its pointed ends and elongated body can provide substantial visible coverage, especially beside a more compact shape. There is no sound reason to assign every marquise a fixed percentage advantage over every round diamond, however. The result depends on the dimensions and proportions of the two specific stones.
Actual size and perceived size are different. A halo can enlarge the overall ring outline. A narrow band can make the center diamond appear more prominent by contrast. Prongs and bezel edges can reveal, frame, or interrupt parts of the outline. None of those choices changes the center diamond’s reported millimeter dimensions or weight.
It is also important to distinguish individual carat weight from total carat weight. A 1.00 ct center diamond is one stone weighing 1.00 carat. A ring described as 1.00 carat total weight may combine a smaller center with side stones, halo diamonds, or pavé. Total carat weight is the combined weight of all the diamonds in the piece, not necessarily the weight of its center stone.
Why two equal-carat marquise diamonds can measure differently
A finished diamond is a three-dimensional object. Length and width describe only the outline visible from above. Depth, girdle volume, shoulder shape, point construction, pavilion structure, and the cutter’s choices all influence where the weight sits.
Several variables matter:
- Depth: A deeper pavilion places more mass below the visible outline.
- Girdle volume: A thicker girdle can retain weight without creating equivalent face-up spread.
- Length-to-width ratio: A slimmer stone may gain length while giving up width; a broader stone does the reverse.
- Outline: Full shoulders, narrow shoulders, curved sides, and the transitions into the points all affect volume.
- Cutting decisions: A cutter may retain weight, shape the outline, improve symmetry, or work around features in the original rough.
The simplest consequence is that a deep diamond may look small for its weight. You pay for the entire stone, including material below the girdle, while the mounted diamond is perceived mainly through its face-up outline.
Outline differences can be substantial even when approximate weight is the same. One published conversion table lists both 15 × 7 mm and 14 × 8 mm near 3.00 ct. The first has a ratio of about 2.14 and looks comparatively long and slender. The second has a ratio of 1.75 and looks shorter and broader. The conflicting-looking entries appear in the same millimeter-to-carat marquise chart, illustrating why dimensions are not interchangeable with weight.
A slightly lighter stone can even have marginally larger face-up measurements. One retailer’s comparison shows a 0.96 ct marquise measuring 10.60 × 5.40 mm beside a 1.00 ct example measuring 10.50 × 5.30 mm. The 0.96 ct stone is lighter, yet its stated length and width are both slightly greater. The example appears in this marquise selection guide.
That comparison does not establish that the lighter stone is better. Visual performance, symmetry, depth, girdle, inclusions, and outline still require inspection. Nor does an unusually large length and width automatically indicate a bargain. Extra spread can accompany shallow proportions, awkward shoulders, weak facet relationships, or an unattractive face-up appearance.
This is the central limitation of a chart built around one dimension pair. A row saying that 1.00 ct is about 10 × 5 mm provides a useful center point, but it hides normal variation. A range communicates that variation more honestly, although it still cannot diagnose whether a specific diamond is attractive.
Some extended conversion tables also contain unexplained or non-monotonic rows. A nominally larger length-and-width combination may be assigned a lower weight than a smaller combination. Differences in depth and proportions can produce counterintuitive results, but unexplained reversals may also indicate weak or undocumented methodology. In either case, inspect the individual stone instead of forcing it into a generic sequence.
Length-to-width ratio: broad, classic, or slender
Length-to-width ratio describes the basic outline of a marquise:
Length ÷ width = length-to-width ratio
For a diamond measuring 10 mm long and 5 mm wide:
10 ÷ 5 = 2.00
That stone is twice as long as it is wide. The ratio says nothing by itself about weight, depth, symmetry, or light performance.
As the ratio changes:
- Around 1.6: The outline appears relatively broad or plump.
- Around 2.0: It resembles the familiar classic-looking reference used in many charts.
- Around 2.2: It appears longer and more slender.
The approximate 1.6–2.2 spectrum is useful for visualizing different styles, not for creating a universal quality scale. The lower-ratio stone is not inherently worse, the higher-ratio stone is not inherently better, and 2.00 is not objectively ideal for every hand or ring design. These examples and the ratio formula are reflected in retailer guidance comparing plump and slender marquise outlines.
Ratio also helps explain why equal-weight stones can have different measurements. A higher-ratio marquise may stretch its visible footprint into greater length and less width. A lower-ratio stone may be shorter but fuller through the center. If finger coverage matters, decide whether you value coverage along the finger, width across it, or a balance of both.
Many charts assume or closely resemble a 2.00 ratio. Dimensions such as 10 × 5 mm, 12 × 6 mm, 13 × 6.5 mm, and 14 × 7 mm all follow that pattern. A 1.75-ratio marquise of comparable weight will not share the same length and width, even if its visible footprint remains substantial.
Do not choose by ratio alone. Inspect:
- Whether the two halves visually mirror each other
- Whether one shoulder is fuller or flatter than the other
- Whether the points align with the stone’s central axis
- Whether the side curves flow smoothly into the tips
- Whether the outline appears pinched, bulging, or uneven
- Whether the shape remains appealing at normal viewing scale
Retailers sometimes attach labels such as “excellent,” “ideal,” or “premium” to selected ratio ranges. Treat these as seller guidance rather than official or universal grades. Two diamonds with the same ratio can still look different because their shoulders, side curves, and tips are constructed differently.
Reverse lookup: estimate carat weight from millimeters
If you know a marquise diamond’s length and width, you can estimate its likely carat neighborhood. This is a reverse reference, not a weight calculation.
| Measured length × width | Approximate carat estimate |
|---|---|
| 6 × 3 mm | About 0.25 ct |
| 8 × 4 mm | About 0.50 ct |
| 9 × 4.5 mm | About 0.75 ct |
| 10 × 5 mm | About 1.00 ct |
| 11 × 5.5 mm | About 1.25 ct |
| 12 × 6 mm | About 1.50 ct |
| 13 × 6.5 mm | About 2.00 ct |
| 14 × 7 mm | About 2.50 ct |
| 16.5 × 8.25 mm | About 4.00 ct |
These lookups appear together in a detailed marquise millimeter-to-carat table. That page also shows why summaries should be checked against their detailed data: its introductory text associates 12 × 6 mm with approximately 2.00 ct, but the table assigns 12 × 6 mm to 1.50 ct and 13 × 6.5 mm to 2.00 ct.
Across the available tables, 12 × 6 mm is more consistently associated with approximately 1.50 ct than with 2.00 ct. This is agreement among published reference tables, some of which may reproduce similar benchmark sequences; it should not be treated as multiple independent measurements of actual diamonds.
Length and width cannot determine weight accurately because they omit depth and girdle volume. Two diamonds may share the same face-up dimensions while one has a deeper pavilion or heavier girdle. Conversely, two stones of equal weight can have different length and width.
If depth is available, treat it as essential comparison information. It helps explain whether a diamond carries more material below the visible outline. Avoid improvised weight formulas unless their assumptions are known and suitable for the actual shape and proportions.
Do not interpolate between rows to excessive precision. A stone measuring 10.2 × 5.1 mm cannot responsibly be assigned a highly specific weight merely because it sits slightly above the 10 × 5 mm benchmark. The problem is especially pronounced at very small sizes, where fractions of a millimeter are significant, and at large sizes, where published tables diverge.
A loose diamond’s actual carat weight is obtained by weighing it. For a mounted diamond that cannot readily be removed, weight may be estimated from accessible dimensions and other observations. Such a result remains an estimate rather than an exact substitute for weighing the loose stone.
How to compare marquise diamonds using a grading report
When shopping online, begin with the individual diamond’s grading report rather than the generic chart. Locate the measurements, normally presented as length × width × depth in millimeters. The chart tells you what may be typical; the report records the measurements of that specific diamond. Grading reports can include all three dimensions, and buyers are advised to compare the reported measurements rather than carat alone in this diamond size and grading-report guide.
Use the same process for every candidate:
- Record length, width, and depth. Do not copy only the first two numbers.
- Calculate the length-to-width ratio. Divide length by width.
- Compare face-up spread. Review actual length and width among stones of similar weight.
- Inspect outline and symmetry. Check the shoulders, side curves, point alignment, and overall balance.
- Review clear video. Watch the center, outline, brightness, contrast, and bow-tie appearance as the stone moves.
- Consider the setting. Confirm that it is intended for the diamond’s actual measurements and protects both points.
Side-by-side comparison is particularly effective. If two stones both weigh around 1.50 ct, do not assume each measures 12 × 6 mm. One may be shorter and broader; another may be longer but narrower or deeper. Decide which outline you prefer before treating spread as a tie-breaker.
A critical visual feature is the bow-tie effect: a dark, bow-tie-shaped area that can appear across the center of an elongated brilliant-style diamond. Its visibility can change as the stone, viewer, or light moves. A size chart cannot reveal whether the bow tie is subtle, distracting, or accompanied by dull-looking areas.
Assess it from moving imagery or in person rather than relying on one still photograph. Viewing the stone as it moves is a practical way to see whether the central contrast remains distracting to you. No size-chart threshold can guarantee an acceptable result, and a claim that every trace of a bow tie can always be eliminated would be too strong.
Other details deserve attention:
- Uneven shoulders: One side may appear fuller, flatter, or more curved.
- Asymmetrical points: The tips may not align cleanly with the center.
- Inclusions near a point: Their location may matter more than the clarity grade alone suggests.
- Girdle condition and thickness: Check for conspicuous extremes or irregularity, especially near the tips.
- Outline flow: The curves should transition coherently from the center through the shoulders.
- Tip condition: Review available magnified imagery for visible condition issues.
These are buyer considerations rather than conclusions that can be drawn from dimensions alone. Measurements answer “How large is it physically?” They do not prove brightness, visual symmetry, or beauty. A longer diamond is not necessarily livelier, and a broader one is not necessarily better balanced.
Settings, tip protection, and perceived size
A marquise has two pointed ends, and commonly recommended settings protect those tips rather than leaving them exposed. Protective approaches include:
- V-prongs: Shaped to cover the pointed ends while leaving much of the outline visible
- Full bezels: Metal surrounds the perimeter, including both tips
- Semi-bezels: Metal protects selected parts of the outline while leaving other areas open
- Purpose-built prong arrangements: Side prongs stabilize the stone while dedicated elements cover its points
V-prongs, bezels, and semi-bezels are specifically identified as protective options in this marquise setting guide.
Confirm that both points are covered by the finished design. A setting should not be judged solely by how little metal it shows or by how large it makes the stone appear. The jeweler must determine how the individual diamond fits and is supported.
The setting can alter perceived size in several ways:
- A halo adds visible width and creates a larger overall outline.
- A narrow band can make the center look more prominent by contrast.
- Fine prongs may leave more of the diamond visible.
- A bezel can create a strong outer silhouette in metal.
- Side stones can broaden the overall composition.
These are presentation effects, not physical conversions. A 10 × 5 mm center remains 10 × 5 mm in a solitaire, halo, bezel, or three-stone ring. Its carat weight does not change.
Give the jeweler the diamond’s actual length, width, and depth. “A setting for a 1-carat marquise” is not sufficiently precise because 1-carat stones can differ in ratio, depth, girdle, and point shape. A generic chart cannot determine exact fit, support, or clearance for an individual stone.
A practical decision process for choosing the right size
A marquise diamond size chart should narrow the search, not make the purchase decision. The following process keeps weight, dimensions, outline, and visual performance in balance.
1. Establish a broad carat budget. Choose a workable range rather than assuming you need one exact number. If you are considering approximately 1.00 ct, compare stones just below and above that mark when their dimensions and appearance are compelling.
2. Identify the visible dimensions you want. Use the chart to translate your weight range into approximate length and width. Decide whether you prioritize length along the finger, width through the center, or a balance of both.
3. Choose an outline direction. Determine whether you prefer a broad, classic-looking, or slender marquise. Use the ratio as descriptive shorthand, not as an automatic quality score.
4. Compare actual reports. Create a list showing each stone’s weight, length, width, depth, and calculated ratio. This makes it easier to spot candidates that carry more weight in depth or depart noticeably from the benchmark.
5. Shortlist stones of similar weight. Compare their face-up measurements without automatically selecting the longest. Slightly less length may be worthwhile if another stone has a more appealing width, outline, or visual performance.
6. Inspect symmetry and shoulders. Look for aligned points, balanced halves, coherent curves, and shoulders that complement one another. Judge whether any asymmetry remains noticeable at a realistic viewing size.
7. Evaluate the bow tie and light behavior. Watch clear video or inspect the diamond in person. Observe the center through a range of angles. A large-looking stone is not a strong choice if its dark or lifeless areas remain distracting to you.
8. Review the tips, girdle, and inclusions. Pay attention to visible condition issues and inclusions near the pointed ends. Ask for clarification if the report or imagery does not show enough to make a considered comparison.
9. Confirm setting compatibility. Provide the jeweler with the exact three-dimensional measurements. Verify that the design protects both points and is intended for the stone’s actual outline rather than only its nominal carat category.
This process resists the “largest spread wins” shortcut. Measurements cannot capture brightness, contrast, bow-tie character, or graceful outline. A slightly smaller-facing diamond may be the stronger choice if it is more attractive in motion and better suited to the ring.
The practical rule is simple: use the chart to set expectations, but use the individual diamond’s reported measurements and appearance to make the decision.
Frequently asked questions
How many millimeters is a 1-carat marquise diamond?
A 1-carat marquise is commonly estimated at about 10 × 5 mm face-up. A fixed 2.00-ratio model gives a slightly larger benchmark of 10.38 × 5.19 mm in its modeled size chart.
Neither pair is guaranteed. An individual 1-carat stone may be longer, shorter, wider, or deeper because of its proportions, girdle, outline, and cutting decisions. Use 10 × 5 mm as an expectation, then check the grading report.
Is a 12 × 6 mm marquise closer to 1.5 or 2 carats?
A 12 × 6 mm marquise is more commonly associated with approximately 1.50 carats, while about 13 × 6.5 mm is the stronger benchmark for 2.00 carats in the available detailed conversion table.
Length and width alone cannot establish exact weight, so depth and girdle volume can change the result. Nevertheless, 1.50 ct is the more defensible initial estimate for 12 × 6 mm.
Can two marquise diamonds with the same carat weight look different in size?
Yes. Equal-weight marquise diamonds can have different face-up dimensions because their weight is distributed differently through the depth, girdle, shoulders, and outline.
One may be broad with moderate depth, while another is narrow or deep. Different length-to-width ratios can also make one appear long and slender and the other short and full. Compare length, width, and depth—not carat alone.
What length-to-width ratio makes a marquise look balanced?
A ratio near 2.00 is a familiar classic-looking reference because the diamond is approximately twice as long as it is wide. It is not objectively best for every buyer.
A ratio around 1.6 creates a plumper outline, while one around 2.2 appears more slender. “Balanced” ultimately depends on shoulder shape, point alignment, visual symmetry, setting design, and personal preference.
Which setting best protects a marquise diamond’s pointed ends?
V-prongs and bezels are commonly recommended protective choices. Semi-bezels and other purpose-built arrangements may also be suitable when both tips are covered.
The best option depends on the individual stone and ring design. Give the jeweler the diamond’s exact length, width, depth, girdle, and point shape rather than relying on a generic carat-size setting.