
Choose the Right Scratch-Test Kit—and Read the Result Correctly
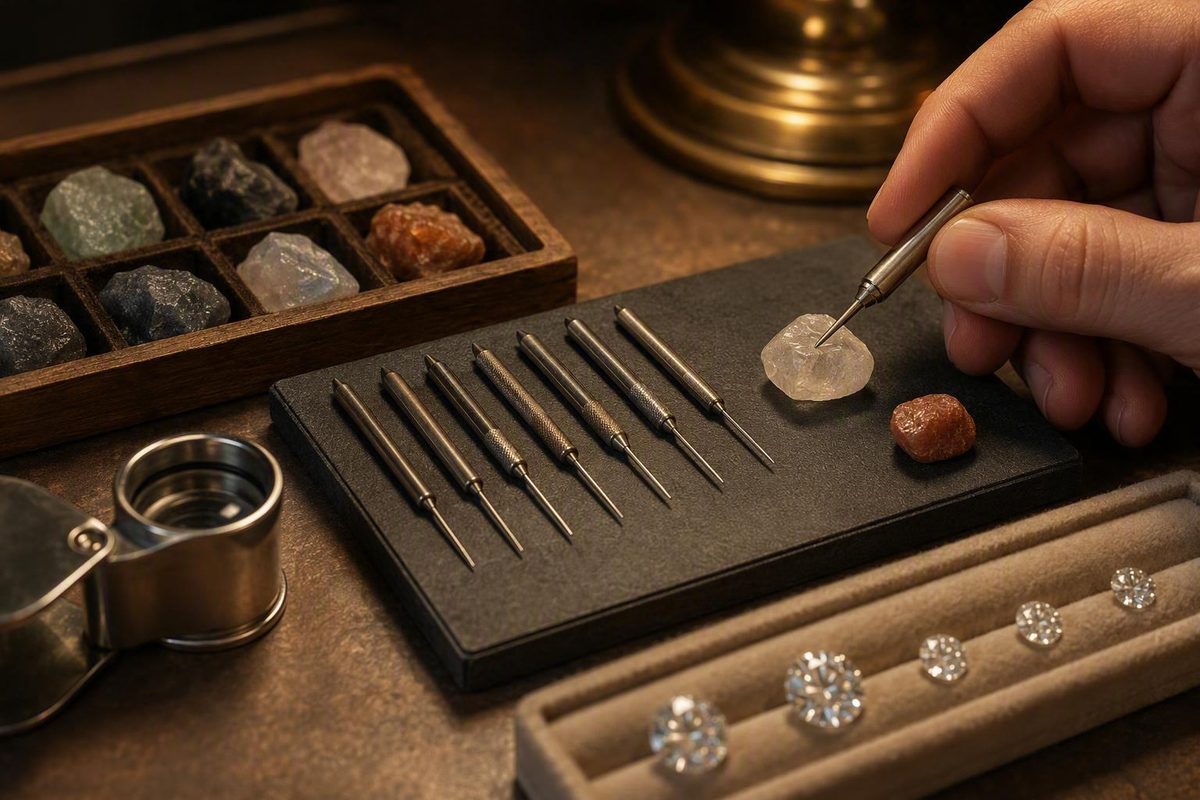
A Mohs hardness test kit provides a portable way to compare a material’s resistance to scratching. It can help a collector narrow a mineral identification, a flooring professional screen a concrete surface, or a materials buyer make a preliminary shop-floor comparison. It cannot provide an exact engineering hardness value, identify a gemstone by itself, or establish whether an object is strong, tough, durable, high-quality, or genuine.
The right kit depends on what you will test, how often you will use it, which part of the Mohs scale matters, and whether a permanent mark is acceptable. Mounted picks suit repeated concrete or industrial screening. Natural reference minerals work well for teaching. Mineral-identification kits should include observations beyond hardness. Household objects are appropriate only when a rough field comparison is sufficient.
Whatever format you choose, technique controls the usefulness of the result. Prepare the surface, progress from softer to harder references, use a fresh location for each stroke, remove residue, confirm that a groove remains, repeat uncertain observations, and report a bracket rather than a falsely precise number.
What a Mohs hardness test kit actually measures
Mohs hardness is relative resistance to scratching. If reference A cuts a persistent groove into sample B, A is harder than B. If A slides over B without cutting it, A is softer than—or potentially close in hardness to—B.
The scale is defined by ten reference minerals:
| Mohs value | Reference mineral |
|---|---|
| 1 | Talc |
| 2 | Gypsum |
| 3 | Calcite |
| 4 | Fluorite |
| 5 | Apatite |
| 6 | Orthoclase |
| 7 | Quartz |
| 8 | Topaz |
| 9 | Corundum |
| 10 | Diamond |
These values and index minerals are summarized by the U.S. National Park Service’s Mohs hardness reference. The operating principle is comparative: a harder reference can scratch a softer material.
The numbers are ordinal and nonlinear. Moving from Mohs 3 to 4 does not represent the same increase in scratch resistance as moving from 8 to 9. A material rated 8 is not “twice as hard” as one rated 4. The numbers establish an order rather than equal measurement units.
A kit therefore produces a qualitative comparison, usually expressed as an interval. If one point fails to scratch and the next harder point succeeds, the tested surface lies between those references under the test conditions. A midpoint such as 4.5 is convenient shorthand for a 4–5 bracket, not an exact measurement to one decimal place.
Scratch resistance must also be distinguished from other properties:
-
Mineral identity depends on several properties, not hardness alone.
-
Overall quality depends on the application and cannot be reduced to one scratch result.
A hard material can still be brittle.
Mohs testing is most useful as a preliminary screening method. It can narrow a list of possible minerals, compare an unknown surface with known references, or provide a local indication of concrete scratch resistance. Its value depends on whether the sampled location represents the material and whether damage is acceptable.
Do not use a Mohs result as a standalone test of gemstone authenticity. The test also damages the successful test point, making it inappropriate for finished or valuable gems.
Choose the kit format that matches the job
Products sold as a “Mohs hardness test kit” fall into four broad formats. They are not interchangeable.
1. Industrial or concrete scratch picks
These generally use mounted metal or alloy points labeled with approximate Mohs values. Their advantages are portability, controlled handling, repeat use, and access to small test areas.
For concrete, flooring, coatings, or general industrial screening, prioritize:
- A clearly disclosed point range
- Durable point labels
- Handles that permit controlled strokes
- Application-specific instructions
- A protective case
- A table relevant to the materials being tested
- A documented method for inspecting, sharpening, or replacing worn points
A material table provides context, but it does not make the result quantitative. The point may encounter a coating, surface paste, aggregate, contamination, or another local feature rather than the intended substrate.
2. Mineral-identification picks
These may resemble industrial picks, but their accessories and instructions are intended for minerals. A useful set combines hardness references with complementary tools such as a streak plate, hand lens, magnet, or mineral table.
Hardness rarely establishes a unique identity. Several minerals can occupy the same range, while weathering, impurities, mixed grains, and different testing locations can complicate the observation. Buy this format as a compact collection of diagnostic tools—not as a device that automatically supplies a mineral’s name.
3. Natural reference-mineral sets
Traditional educational sets provide pieces of the minerals defining the scale. Many contain reference specimens from talc through corundum, or Mohs 1 through 9. Diamond is commonly omitted because of cost and because a sufficiently small piece would require a practical mount, as explained in Geology.com’s guide to Mohs reference kits.
Natural references make the scale tangible for classrooms and collections. Their compromises are handling and wear. Labels and storage compartments must remain unambiguous.
4. Inexpensive educational or multi-tool kits
Low-cost mineral kits may combine a streak plate, magnet, magnifier, specimen pieces, and a basic scratching tool. That can be good value for introductory identification work, but it does not make the kit equivalent to a dedicated set of labeled, mounted picks.
Marketplace results mix industrial pick sets, natural-mineral collections, basic identification kits, and generic scratch testers under the same search term. Product titles alone do not establish a common range, construction, tolerance, or intended workload.
Household and homemade references
For occasional field screening, a specimen can be compared with a fingernail, coin, glass plate, knife, nail, or known mineral fragment. Small mineral pieces can also be attached to rods or dowels for better control.
These references are approximate. Natural fragments may have altered surfaces, unsuitable shapes, or blunt points.
Improvised references can answer a bounded question such as “Is this specimen harder or softer than this piece of glass?” They are less suitable when results must be repeated, documented, or compared across operators.
A practical decision rule is:
- Choose professional mounted picks for repeated testing, small test areas, controlled handling, or workplace records.
- Choose natural reference minerals for teaching the scale or directly comparing mineral specimens.
- Choose a broader mineral-identification kit when identification—not hardness alone—is the goal.
- Use improvised references only when a rough field bracket is sufficient.
Buyer’s checklist: the specifications that matter
A polished case, favorable reviews, or terms such as “professional” reveal little about measurement reliability. Inspect the specifications that affect actual use.
Confirm the point range. Do not assume every kit covers Mohs 1 through 10. The listing should disclose that limitation clearly.
Supplementary plates at approximately 2.5, 3.5, or 5.5 can support comparisons near useful boundaries, but they do not replace missing endpoints.
Look for unmistakable labels. Each point should be stamped, engraved, or otherwise identified with a dependable key. If a tip, cap, or handle can be switched without preserving its value, results become vulnerable to recording errors.
Compare point formats. Mounted picks are convenient for repeated testing and small locations. Double-ended tools reduce bulk but leave an opposite point that must be handled and stored carefully. Loose mineral pieces are appropriate for education but can become awkward as their working edges wear.
Read the instructions. Useful instructions should address:
- Surface preparation
- Point sequence
- Pressure and stroke control
- Fresh test locations
- Residue versus a genuine groove
- Repetition of ambiguous trials
- Bracketing and reporting
- Application-specific issues such as coatings or concrete aggregate
Instructions that merely say “scratch the material and read the number” omit the main sources of interpretation error.
Match accessories to the application. A grinding stone may help maintain a point when the manufacturer authorizes sharpening. Reference plates can support comparisons. For mineral identification, a streak plate, magnet, hand lens, and mineral table add evidence beyond hardness.
Treat maintenance as a serviceability issue. The supplied commercial listings do not provide a post-maintenance calibration procedure or tolerance.
Inspect the case and commercial terms. Compare the warranty, return period, replacement-part availability, shipping charges, and total delivered price—not just the headline price.
Look for tolerances and traceability. A serious listing may explain how values are established, whether tolerances apply, or whether verification documents are available. The listings reviewed here do not provide enough information to compare calibration, accuracy, repeatability, or long-term wear.
Finally, treat “premium,” “accurate,” “professional,” and “industrial grade” as marketing language unless the seller supplies a defined specification and appropriate evidence. Customer ratings can reflect satisfaction but do not demonstrate calibration, standards compliance, accuracy, or durability.
Verified comparison of representative kits and listings
This comparison is limited to information disclosed on the captured seller pages. Prices and commercial terms were checked against those pages on August 16, 2026 and should be reverified before purchase. An undisclosed field remains unknown; it is not inferred from photographs or similar-looking products.
| Kit or listing | Seller-listed price snapshot | Stated application | Disclosed range | Included accessories or documentation | Serviceability and warranty | Important undisclosed details |
|---|---|---|---|---|---|---|
| Mineralab HD-2 | $130 | Industrial materials and concrete | Four double-ended picks covering 2–9 | Plates rated 3.5 and 5.5, 100-grit grinding stone, molded case, instructions, and table covering 80 materials | One-year warranty and 30-day money-back guarantee | Calibration tolerances and traceability |
| Mineralab HD-1G | $125 | Mineral identification | Four double-ended picks covering 2–9 | Three supplementary plates, 100-grit grinding stone, streak plate, magnet, case, instructions, and table covering 300 minerals | Seller describes points as sharpenable and replaceable; one-year warranty and 30-day guarantee | Calibration tolerances, traceability, and verified post-maintenance checks |
| Runyon concrete kit | $135 | Concrete surface hardness | Not disclosed on captured page | Specification-sheet link and instructional video shown; full contents not stated | Not disclosed | Included values, full contents, manufacturer, calibration, and warranty |
| Xtreme Polishing Systems kit | $150 | Testing the underlying concrete matrix | Number and values not disclosed | Seller states that it includes customized components, instructions, hardness tables, and a case | Seller describes tips as resharpenable and replaceable; warranty not disclosed | Calibration method, point values, replacement-tip cost, and warranty |
The Mineralab HD-2 and HD-1G share a disclosed 2–9 point range but serve different applications. The HD-2 has an industrial and concrete-oriented accessory package, while the HD-1G adds a streak plate, magnet, extra plate, and a larger mineral table.
Runyon’s retailer page instructs the user to begin with the lowest-numbered pick and move upward until the concrete scratches. Its captured page does not identify the included range, complete contents, manufacturer, calibration details, or warranty.
Xtreme Polishing Systems markets its kit for the underlying concrete matrix and states that its tips can be resharpened and replaced. The page does not disclose the number or values of the picks, calibration method, warranty, or replacement cost.
The four captured prices cluster from $125 to $150, excluding changing shipping charges and taxes. That is a time-sensitive snapshot of these listings, not a permanent market range.
There is no defensible overall winner. The evidence contains no independent side-by-side testing of accuracy, operator repeatability, wear, durability, or service life. The meaningful documented distinction is application fit and the completeness of the disclosed specifications.
How to perform a Mohs scratch test step by step
A careful Mohs test is a sequence of comparisons, not one aggressive stroke with the hardest point.
1. Decide whether the test is suitable.
A successful scratch test creates a permanent groove. Do not proceed if even a small mark would be unacceptable. Choose a small, inconspicuous location that represents the material you intend to assess.
For a mineral specimen, avoid a delicate crystal termination or display face. On concrete or flooring, determine whether the target is a coating, sealer, surface paste, exposed aggregate, or underlying matrix. Those features are not interchangeable.
2. Prepare the surface.
Remove dust, oil, loose grit, or other contamination. Use a fresh, unweathered mineral surface where practical. On concrete, remove only what the test purpose and applicable procedure permit; do not grind through a coating if the coating itself is the target.
3. Hold the specimen safely.
Hold or position the specimen so it cannot rotate unexpectedly. Keep fingers clear of the projected path and direct the testing stroke away from the body. Geology.com’s procedure specifically advises dragging the reference away from the body and parallel to the fingers holding the unknown specimen (testing and safety guidance).
4. Inspect and identify the point.
Confirm the reference value before each stroke. Use a clean, clearly labeled, undamaged point with a suitable working tip. Do not guess a point’s value from color alone unless the kit provides a dependable color key.
5. Start with a relatively soft reference.
Progress upward instead of beginning with the hardest point.
If prior knowledge suggests a narrow range, begin below that expected range rather than automatically starting at the lowest available value.
6. Use controlled pressure and a short stroke.
Draw the point across a short distance using firm, controlled pressure. Do not stab, chip, saw, or repeatedly plow the same line. The purpose is to determine whether the point cuts the surface, not whether enough force can break or dislodge it.
Use a fresh location for every comparison. A later point passing through an existing groove is not an independent test.
7. Classify the observation.
Three broad outcomes are possible:
- The point slides without cutting. It leaves no line or only a superficial contact mark.
- The point leaves powder, residue, or a metallic trail. Material has transferred or loose surface matter has moved.
- The point creates a persistent groove. The sample surface has been cut.
A visible line is not automatically a scratch. Metal picks can leave a gray transfer trail on a harder surface.
8. Clean and inspect the mark.
Wipe or rub the line to remove loose powder and transferred material. Inspect it under good light and use magnification when the result is faint. Only a distinct groove that remains after residue is removed counts as a scratch.
A mineral-testing procedure likewise recommends a fresh surface, a sharp reference, rubbing the line to confirm that it is etched, and repeating uncertain observations (Rockman scratch-test procedure).
Do not mistake crumbling, grain pullout, displaced aggregate, or flaking coating for a clean groove in a uniform substrate.
9. Continue until you establish a bracket.
Move upward through the references, cleaning and inspecting each mark. Stop when you have a repeatable transition between the hardest point that does not scratch and the softest point that does.
10. Repeat uncertain comparisons.
When the sample and reference are close in hardness, the mark may be faint or intermittent. Repeat both boundary observations on fresh areas. If the trials disagree, inspect the point, surface, location, and technique before reporting a result.
11. Document heterogeneous surfaces.
Record whether the point contacted paste, coating, sealer, aggregate, filler, or a visible mineral grain.
Testing multiple documented locations is prudent when variability matters, but the supplied evidence does not establish a universal sample count for every material or decision.
12. Record the test.
At minimum, document:
- Material or specimen identifier
- Date and operator
- Exact test location
- Surface condition and preparation
- Reference-point sequence
- Scratch, no-scratch, residue, or ambiguous result
- Repeated trials
- Final bracket
- Coating failure, grain pullout, or other limitations
- Photographs when practical
Good records preserve the evidence behind the result. A bare statement such as “Mohs 5” does not reveal what was tested or how the mark was interpreted.
How to bracket, report, and troubleshoot the result
A bracket is based on two boundary observations:
- The hardest reference that does not scratch the sample
- The softest reference that does scratch the sample
If point 4 does not create a persistent groove but point 5 does, report:
Mohs scratch-hardness bracket: 4–5
You may write “approximately 4.5” if the report explains that the midpoint is shorthand for the observed 4–5 interval. This example is also used in the Mineralab seller instructions, but it remains a qualitative bracket rather than an exact quantitative measurement.
Keep the direction of comparison clear. If point 5 scratches the sample, the point is harder than the tested surface. If point 4 does not scratch it, the surface resists that reference. Together, the observations place the tested surface between them under the conditions used.
Equal or nearly equal hardness may produce a faint, intermittent, or pressure-sensitive mark. Repeat the trials on clean areas rather than forcing a midpoint. If ambiguity remains, report the unresolved interval and test conditions.
If you see a removable gray line: suspect transferred metal. Wipe the line and inspect the surface from different angles. A trail that disappears without leaving a groove is not a scratch. The distinction among sliding, scratching, and leaving a metal trail is also described by 911Metallurgist’s overview of pick-test observations.
If you see loose powder: determine whether it came from the point, surface contamination, a weathered layer, a coating, or the sample. Powder alone does not prove that the intended substrate was cut.
If grains crumble or pull out: record granular failure rather than automatically calling it a scratch.
If a coating flakes: record coating failure at that location. That observation does not necessarily establish either the coating’s scratch hardness or the substrate’s hardness.
If results vary, check for:
- A dull, chipped, dirty, or mislabeled point
- Different pressure or point angle
- A rough, contaminated, or weathered surface
- Existing grooves
- Mixed minerals or changing grains
- A coating or sealer
- Aggregate at one location and paste at another
- Testing close to a pore, edge, crack, or defect
If inconsistency remains after reasonable repeats, report it. “Mohs 4–6, variable by location” is more useful than an unjustified “5.”
A compact field report can use this format:
Material or specimen: Location or sample ID: Surface condition and preparation: Feature tested: paste / aggregate / coating / mineral grain / other Reference sequence: Observations: point __; scratch / no scratch / residue / ambiguous Repeat observations: Final bracket: Limitations or variability: Photographs: file names or links
Damage risk, material limitations, and when not to test
A Mohs scratch test is destructive at the successful test point. It creates a groove. Mohs testing is therefore not fully nondestructive, as noted in a third-party review of the method’s limitations (commercial technical overview).
Do not scratch-test finished jewelry, mounted gemstones, collectible specimens, valuable crystals, polished countertops, completed flooring, coated glass, antiques, or fragile surfaces when visible damage would be unacceptable. An inconspicuous location reduces the cosmetic consequence; it does not make the test nondestructive.
Gemstones require particular caution. Hardness is not identity, and scratching an exposed facet, setting, or finished surface provides limited evidence while creating damage. Do not attempt to prove that a stone is diamond by scratching glass, another gem, or the finished stone itself.
Surface layers can also redirect the interpretation. A test may describe:
- A sealer instead of concrete
- A coating instead of metal or glass
- Weathering instead of fresh mineral
- Contamination instead of the substrate
- Exposed aggregate instead of cement paste
- Filler or reinforcement instead of the surrounding composite
State exactly what the point contacted. If the intended substrate cannot be exposed without unacceptable damage or inappropriate preparation, decline the test or select another method.
Rocks present an additional limitation because many contain several minerals. A point may cross a soft matrix and stop at a harder grain. Impurities, alteration, boundaries, and texture can all affect the observation. One scratch does not necessarily characterize the entire rock.
For mineral identification, combine the bracket with appropriate observations such as:
- Streak
- Luster and color
- Crystal form or cleavage
- Fracture
- Texture and grain size
- Magnetism
- Density or heft
- Geological setting
- Other suitable diagnostic tests
Concrete and other heterogeneous surfaces should likewise be assessed at multiple documented locations when representative conditions matter. The appropriate sampling plan depends on the surface, observed variation, purpose, project requirements, and consequences of a wrong conclusion; no universal number is established here.
When precise engineering data are required, use the specified quantitative or standardized method rather than converting a Mohs bracket into Rockwell, Vickers, Brinell, or another scale. Those systems use different principles, equipment, loads, indenters, and reporting units.
A third-party commercial explainer associates ASTM C1895 with Mohs scratch hardness, but that source is not the official standard. This article does not establish the standard’s scope or claim that any listed kit or procedure complies with it.
Care, maintenance, and lower-cost alternatives
Wipe points after use to remove mineral powder, concrete residue, dust, and transferred material. Follow the manufacturer’s cleaning instructions, dry the tools before closing the case, and store them separately from dirty grinding accessories or loose abrasives.
Before testing, inspect each point for:
- Blunting or rounding
- Chips, bending, or other damage
- Adhered residue
- Corrosion or contamination
- A secure mount
- A clear hardness label
A damaged or contaminated tip can undermine the comparison. If the point cannot be identified or inspected confidently, do not use it for a recorded result.
Follow the seller’s instructions for sharpening or replacement. Mineralab’s two listed sets include a 100-grit grinding stone and describe their relevant points as sharpenable; the XPS seller describes its tips as both resharpenable and replaceable. These are seller serviceability claims, not evidence that maintenance preserves a verified tolerance or effective calibration.
Natural mineral fragments offer a lower-cost alternative. Small pieces can be sorted into labeled compartments or mounted on dowels, rods, or tubing. Mounting improves handling and can help a small working edge reach confined areas. Replace a fragment when it becomes blunt, contaminated, loose, or too worn to identify confidently.
A homemade kit still requires disciplined labeling and storage. Record each fragment’s source and assigned value, and do not rely on appearance alone to distinguish similar pieces. Participants in a Mindat forum discussion of homemade hardness picks describe loose mineral chips and fragments mounted on rods as budget approaches, but those comments are anecdotal rather than controlled product testing.
Common objects are more accessible but should be treated as broad field comparisons, not calibrated constants. The National Park Service gives example values of a fingernail at about 2.5, a copper penny at about 3.5, a knife or glass plate at about 5.5, a steel nail at about 6.5, and a masonry drill bit at about 8.5 (NPS comparison chart). Composition, manufacture, treatment, coatings, wear, and condition can change the effective result, so record the actual object used.
The value decision depends on frequency and consequence:
- For a classroom demonstration or occasional collection check, natural fragments or a basic identification set may be sufficient.
- For rough field screening, common objects can establish broad boundaries.
- For repeated professional screening, clearly labeled mounted picks, suitable instructions, a protective case, relevant tables, and available replacement parts deserve more weight than the lowest purchase price.
- For consequential or quantitative decisions, a Mohs kit is not a substitute for the required measurement method.
Frequently asked questions
Why do many Mohs hardness test kits include points 2 through 9 instead of 1 through 10?
The documented Mineralab metal-alloy systems provide eight points numbered 2 through 9. They do not cover the complete 1–10 scale.
The supplied evidence does not establish why every metal-pick manufacturer chooses those endpoints. For natural-mineral kits, diamond at 10 is commonly omitted because of cost and because a small usable specimen would require mounting. Buyers should verify the disclosed range instead of assuming that every kit includes all ten reference values.
Does a metal line left by a hardness pick count as a scratch?
No. A point can leave a gray or shiny transfer line without cutting the surface.
Wipe the mark and inspect it under good light or magnification. Count it as a scratch only when a distinct groove remains after powder and transferred material are removed. Repeat uncertain observations on a fresh location.
Are inexpensive mineral-identification kits equivalent to professional Mohs picks?
Not automatically. A low-cost kit may be useful for teaching or preliminary identification, especially when it includes a streak plate, magnet, magnifier, or mineral specimens.
It may not offer the same numbered range, mounted-point access, labeling, case, instructions, replaceability, or suitability for repeated testing. Compare disclosed contents and intended use rather than relying on price or the product title.
Can I use a Mohs hardness test kit on a diamond, gemstone, or finished piece of jewelry?
Do not scratch-test a diamond, mounted gemstone, or finished jewelry surface when damage is unacceptable. A successful test leaves a groove, while an unsuccessful stroke may still mark the setting or disturb the finish.
Hardness cannot authenticate a gemstone by itself. When identity or authenticity matters, use appropriate gemological examination rather than a destructive scratch test.
Can a Mohs result be converted to Rockwell, Vickers, or Brinell hardness?
Not through a reliable one-to-one conversion. Mohs is an ordinal scratch-resistance scale. Rockwell, Vickers, and Brinell methods use defined indentation procedures, loads, geometries, and reporting systems.
A general comparison chart cannot turn a Mohs bracket into a valid quantitative result. If a specification requires Rockwell, Vickers, Brinell, or another standardized value, test the material using that required method.
Choose by application, not by a universal ranking. Select a clearly labeled system with the range, accessories, instructions, and serviceability appropriate to the material. Test a clean surface, progress through the references, use fresh locations, verify every apparent groove, and repeat uncertain trials. Report a bracket rather than false precision, and decline the test whenever the mark could damage a valuable, finished, coated, or fragile object.
Mohs testing is a practical screening method—not complete mineral identification, gemstone authentication, or quantitative engineering measurement.