
How to Build a Balanced Three-Diamond Ring Without Guessing
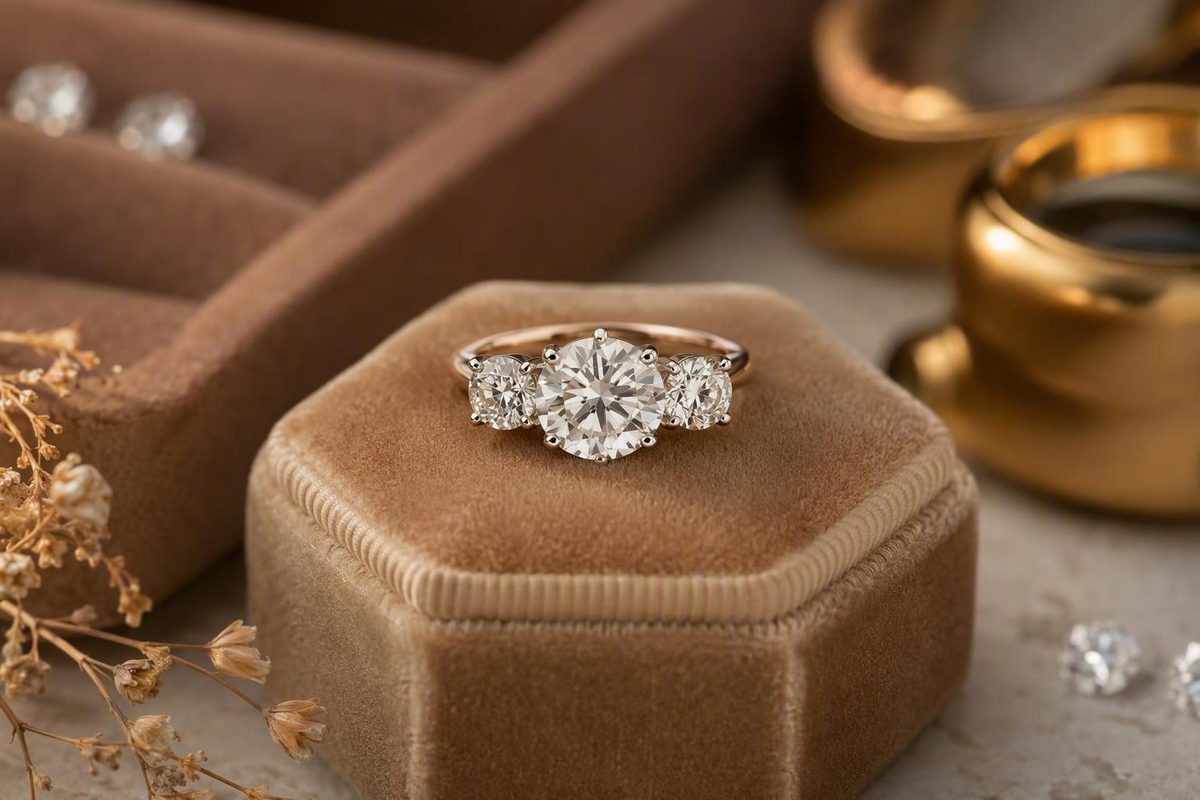
Three Stone Lab Grown Diamond Ring: Complete Buying Guide
By Sofia Marchetti, trained gemologist and former appraisal-bench professional. Merchant prices in this guide come from listings captured in the supplied August 2026 evidence. Because prices, inventory, configurations, and promotions can change, verify every quote before ordering. Retailer-authored design and construction advice is treated as seller guidance, not as a universal manufacturing standard.
A three stone lab grown diamond ring succeeds as a composition, not as a carat-weight contest. The center and side diamonds must work together in dimensions, outline, visible color, light performance, setting angle, and finger coverage. A large total carat figure can still produce an awkward ring if the center lacks presence, the side stones do not match, or the finished row extends too far across the finger.
The buying process also presents a disclosure problem: “lab-grown center available” does not necessarily mean all three diamonds are lab-grown. Nor does an advertised price necessarily include the setting and every stone.
Before ordering, establish five facts:
- Whether the center and both side diamonds are lab-grown.
- The individual carat weights and millimeter dimensions.
- How the three stones look together rather than separately.
- The finished ring’s span, profile, and wedding-band clearance.
- The complete price and written seller policies.
What counts as a three-stone lab-grown diamond ring?
A three-stone ring, also called a trilogy ring, places a center stone between two side stones. The center is usually larger, although equal-looking and unconventional graduated arrangements also exist.
A halo is different as well. It surrounds a center stone with a border of smaller diamonds, while a three-stone ring creates a horizontal—or sometimes angled—row of three primary stones. A design can combine categories by adding pavé, halos, or hidden accents, but its defining three-stone feature remains the center flanked by two recognizable side stones.
All three diamonds can be lab-grown. The product name alone, however, may not prove that they are. Some collections let the buyer choose a natural or lab-grown center without clearly establishing the origin of the side diamonds. A configurator that proves the center is lab-grown therefore does not necessarily answer the same question for the completed ring, as illustrated by Ritani’s three-stone configuration options.
Request written confirmation in unambiguous language:
The center diamond, left side diamond, and right side diamond are all lab-grown diamonds.
Then ask what documentation supports that statement. An invoice or specification sheet identifying all three stones is more precise than a category label, verbal assurance, or checkout option that refers only to the center.
Three-stone rings are commonly associated with the past, present, and future of a relationship. That symbolism is a tradition, not a measurable quality or performance advantage. It can be meaningful to the wearer without affecting appearance, construction, or price.
There are four principal buying paths:
- Ready to ship: The stones and setting are already assembled. The actual ring may be available to inspect, but size and design choices are limited.
- Configurable: You select a setting, center diamond, metal, and sometimes side-stone options. Confirm whether the illustrated sides are placeholders, included stones, or separately priced selections.
- Made to order: The seller produces an established design after receiving the order and may source side stones to complement the selected center.
- Fully custom: The jeweler develops the setting and sources or accepts stones for a particular brief. Approval stages, cancellation terms, tolerances, and responsibility for customer-supplied stones become especially important.
The safest interpretation is literal: a three-stone lab-grown diamond ring contains three lab-grown diamonds. If the listing proves only that the center is lab-grown, treat the side-stone origin as unresolved.
Start with proportions, not total carat weight
Total carat weight, commonly abbreviated CTW or TCW, is the combined weight of the diamonds included in the stated total. Center-stone carat weight describes only the middle diamond. The figures are not interchangeable.
Consider this arrangement:
- 1.50 ct center diamond
- 0.75 ct left side diamond
- 0.75 ct right side diamond
- 3.00 ct total weight
It totals three carats, but it will not look like a solitaire with one 3.00 ct center. The ring may provide broad coverage, yet its focal diamond remains a 1.50 ct stone. Carat measures weight rather than face-up dimensions, and distributing that weight among three diamonds creates a different silhouette from concentrating it in one, as the same illustrative layout also demonstrates in a three-stone planning discussion.
Two proportion frameworks can provide starting points.
One jeweler-authored guide suggests putting approximately 60% to 75% of the total weight in the center, with the remaining weight divided at roughly 10% to 20% per side. These are approximate paired distributions: the center and both side percentages still need to total about 100%, so the endpoints should not be combined indiscriminately. For a two-carat-total ring, the same guidance suggests an approximately 1.2–1.5 ct center with approximately 0.25–0.40 ct on each side (Nekta New York’s carat-distribution guidance).
A separate guide suggests that each side diamond may weigh approximately 40% to 60% as much as the center, while explicitly treating the range as flexible rather than mandatory (SGL’s three-stone ring guide).
For a two-carat-total target, possible starting configurations include:
| Center | Left side | Right side | Total | Likely emphasis |
|---|---|---|---|---|
| 1.50 ct | 0.25 ct | 0.25 ct | 2.00 ct | Strongly dominant center |
| 1.30 ct | 0.35 ct | 0.35 ct | 2.00 ct | Graduated, integrated trio |
| 1.20 ct | 0.40 ct | 0.40 ct | 2.00 ct | Greater side-stone presence |
These are weight allocations, not promises about appearance. An elongated center can face up differently from a square center of the same weight. Pears, half-moons, trillions, and tapered baguettes also distribute their area differently, so carat ratios alone cannot predict the finished relationship.
Three broad layouts are useful to distinguish:
Dominant center. The eye lands on the center immediately, with the sides acting as a frame. This is appropriate when the center shape should remain the main event.
Graduated arrangement. The sides are substantial but visibly smaller. The transition across the finger feels continuous, while all three stones remain identifiable.
Three nearly equal-looking stones. The ring reads as a row rather than a center with supporting diamonds. This can produce substantial spread, but it changes the visual hierarchy and makes side-to-side matching especially noticeable.
Choose a center diamond with a pleasing face-up appearance before allocating the remaining weight and width to the sides. Enlarging the side stones does not correct a center that looks dull, faces up small for its weight, or appears incompatible with them.
Treat every ratio as a design tool, not a pass-or-fail standard. Shape, length-to-width ratio, millimeter dimensions, setting angle, finger width, and personal preference can all justify departing from the starting figures.
Use millimeter dimensions to predict finger coverage
Carat is a unit of weight. It does not directly state how many millimeters of diamond will be visible from above. Equal-carat diamonds can have different lengths, widths, depths, outlines, and face-up impressions.
For each diamond, record:
- Carat weight
- Length in millimeters
- Width in millimeters
- Depth in millimeters
- Shape
- Length-to-width ratio
- Orientation in the finished setting
Length and width are particularly important when estimating the visible row. An oval, pear, marquise, or elongated cushion may present a longer face-up outline than a round or square diamond of equal weight. That does not make it inherently better; it means the weight has been distributed differently.
A practical design measurement is the finished across-finger span: the approximate distance from the outer edge of one side stone to the outer edge of the other.
- Gaps or overlap between outlines
- Side-stone angle or tilt
- East-west orientation
- Prong thickness and position
- Bezels or other metal borders
- Setting curvature
- Stone height
- Whether the side stones wrap around the finger
Confirm ring size and assess finger width before finalizing the diamonds. The same trio can look balanced on one hand and too wide on another. At the other extreme, very small side diamonds may read more like accents than a true trilogy.
Use this planning sequence:
- Confirm the intended ring size. Avoid relying on an estimate for a custom or tightly proportioned design.
- Obtain the exact measurements of all three diamonds.
- Ask for the expected finished span. Specify that you want the outer-edge-to-outer-edge measurement of the completed arrangement.
- Review the design at scale. Useful options include an assembled-stone photograph, an on-hand model, a wax or resin sample, or a correctly scaled CAD rendering.
- Inspect top and profile views. The top view shows coverage; the profile reveals height, tilt, prongs, gallery structure, and band clearance.
- Ask whether the side stones curve around the finger. If they do, their full nominal width may not be visible from directly above.
Ask for dimensions on the drawing and verify that any hand mock-up reflects the intended ring size. Do not assume a generic online hand model represents the wearer.
The goal is not maximum span. It is enough coverage to create the desired three-stone presence without pushing the arrangement beyond the comfortable top surface of the finger.
Choose center and side-stone shapes as one composition
A successful trio does not require all three diamonds to share the same shape. It does require their outlines to make sense together.
The following matrix presents common pairings and drafting options, not universal rules:
| Center shape | Possible side-stone options | Typical design effect |
|---|---|---|
| Round | Pears or matching rounds | Pears create an outward taper; rounds create a repeated rhythm |
| Oval | Trillions, half-moons, pears, or matching ovals | Trillions add angular contrast; curved sides soften the transition |
| Emerald | Trapezoids or tapered baguettes | Step-cut sides create an architectural frame and controlled taper |
| Cushion | Half-moons or matching cushions | Half-moons soften the outline; matching cushions create a substantial row |
| Radiant | Trapezoids, tapered baguettes, half-moons, or pears | Angular sides emphasize geometry; curved sides soften the corners |
| Pear | Compatible tapered or curved custom sides | The sides can reinforce the center’s direction or balance its asymmetry |
The first four rows reflect combinations commonly discussed in the supplied buying guidance. Radiant- and pear-center suggestions should be treated as aesthetic drafting options to evaluate with actual stones, not as established best pairings.
Matching-shape arrangements repeat the center’s outline. Three rounds can look rhythmic and cohesive; three ovals or cushions can create a broad row. Because the repetition invites direct comparison, inconsistencies in outline and proportion may be easy to see.
Mixed-shape arrangements use contrast to frame the center. Pears can taper away from a round or oval. Half-moons can sit close to curved outlines. Trapezoids and tapered baguettes can extend the horizontal lines of an emerald center without repeating its rectangular shape.
Step-cut centers deserve particular attention. Step-cut trapezoids or tapered baguettes can continue that architectural character, while brilliant-style sides can create stronger contrast. Neither approach is automatically preferable; inspect the actual trio in motion.
Rounded sides such as half-moons, ovals, or curved pears can create a softer outer silhouette. Angular stones can make the design more graphic. The choice depends on whether the desired ring should look flowing, crisp, traditional, modern, or understated.
Orientation also affects the composition. Pears, baguettes, and bullet-like shapes are often placed east-west as side stones, with their longer dimension running across the finger. Other shapes may also be rotated if the setting is designed for that orientation.
The side diamonds should appear symmetrical as a pair. What matters is that their visible dimensions, outlines, facet patterns, color appearance, and placement look consistent.
Do not buy three individually attractive diamonds and assume they will form an attractive ring. Ask to see the selected stones arranged in their intended left-center-right order. Evaluate the spaces between them, the transition in height and width, and whether one side diamond attracts more attention than its partner.
Match what the eye sees—and verify what the reports say
Matching three diamonds is not the same as finding three identical grading lines.
Visible color consistency is generally desirable because the diamonds sit beside one another. A difference that would be inconspicuous in separate rings may become apparent when the stones share the same setting. Metal color, shape, size, and faceting can also affect how color appears, so compare the actual diamonds rather than relying only on letter grades.
Clarity grades do not necessarily need to match. A smaller side diamond may contain an inclusion that is not distracting at normal viewing distance even when its grade differs from the center’s. Paying for identical high clarity across all three stones may add cost without creating a visible improvement.
Review these factors together:
- Face-up dimensions
- Outline and length-to-width ratio
- Visible body color
- Facet pattern and contrast
- Bright and dark areas during movement
- Transparency or haziness
- Side-to-side symmetry
- Appearance under the same lighting
Paper matching provides a documented baseline. It does not replace visual matching.
Cut documentation also varies by shape. GIA assigns an overall cut grade only to round brilliant diamonds, so buyers should not expect the same overall cut-grade field on oval, pear, emerald, cushion, radiant, trapezoid, or half-moon reports. Fancy shapes require evaluation of their proportions, outline, contrast, and appearance in motion (GIA’s three-stone buying guide).
Request grading documentation that identifies a reported diamond as laboratory-grown and records its characteristics. The report number should correspond to the stone being offered. If the seller supplies a report-inscription photograph, confirm that it is legible and consistent with the paperwork.
In that situation, ask:
- How is each side stone’s lab-grown origin documented?
- Are the side weights listed individually or only as combined weight?
- What color and clarity grades or ranges are represented?
- Are the dimensions recorded?
- Was the pair selected for this particular center?
- Will the specifications appear on the invoice or finished-ring document?
Those matters require inspection of the stones and finished design.
For a made-to-order or custom ring, request a side-by-side video before final approval. If possible, inspect the stones under more than one condition, such as diffuse daylight and ordinary indoor lighting. Rotate and rock the trio rather than judging a single still frame. Mixed shapes will not flash identically, but one side should not remain persistently darker, yellower, hazier, or less lively than its partner.
Compare settings by protection, profile, and wedding-band fit
The setting determines how a three-stone ring wears. Top-down photographs show the broad design but often conceal the architecture affecting edge exposure, comfort, cleaning access, and wedding-band fit.
Common configurations include:
- Open-prong setting: Individual prongs hold the diamonds while leaving much of each outline visible.
- Bezel setting: A metal rim surrounds more of the diamond’s edge and changes the visible outline.
- Trellis setting: Interwoven supports rise and cross beneath or between the stones.
- Cathedral setting: The shoulders of the shank rise toward the central arrangement.
- Basket or gallery setting: A framework supports the diamonds below their girdles. Its shape and height can vary considerably.
- Pavé setting: Small diamonds are set into the band or surrounding details, adding more stones and setting points to maintain.
Prongs and bezels should be considered as trade-offs rather than ranked absolutely. Prongs leave more of the diamond and its edge exposed. A bezel surrounds more of the perimeter with metal and generally provides greater edge protection, although the result still depends on the particular design and workmanship (GIA’s comparison of three-stone mounting options).
Profile height matters as much as the setting label. A low basket may keep the ring close to the hand but obstruct a straight wedding band. A taller design may create more clearance while feeling more prominent.
Ask for a profile drawing or CAD view showing:
- The bottom of the center and side-stone baskets
- Prong positions
- The gallery rail
- Height above the finger
- Where a straight wedding band would sit
- Whether the band would touch diamonds, prongs, or gallery metal
- Any intentional gap
Do not accept “it should sit flush” based only on a top view. Wedding-band clearance depends on the specific basket, gallery, side-stone spread, prong placement, and profile.
A flush fit is not inherently better than a deliberate gap. Some wearers prefer separation, while others use a shaped or contoured band. The important point is to know the expected result before production.
Cleaning access also varies. An open gallery may make the underside of the diamonds easier to reach. Intricate trellis work, low baskets, pavé, and hidden accents can create additional recesses that require more careful cleaning. Treat these as design-specific considerations rather than universal rules.
Discuss resizing before purchase. Ask the jeweler for a written resizing range for the exact design.
When trying on a sample or reviewing a model, check:
- Does the ring press against adjacent fingers?
- Do the outer settings extend beyond the comfortable top of the finger?
- Does it catch during ordinary hand movements?
- Is the profile higher than expected?
- Does the ring rotate because the top is wide or heavy?
- Can the undersides of the diamonds be reached for cleaning?
- Does the intended wedding band sit as planned?
- Would diamond edges or prongs rub against the band?
The practical choice is the one that balances appearance with acceptable edge exposure, profile, comfort, maintenance, and band compatibility.
Build the complete price instead of comparing headline numbers
An advertised figure may represent:
- A setting price only
- A starting configuration
- A ring with preset sides but no center
- A complete ring with all three diamonds
- A price for one metal, size, or variant
- A promotional price
- A custom-design deposit rather than the final total
Do not compare two prices until you know what each includes.
Request an itemized quote with separate lines for:
| Component | Quoted amount |
|---|---|
| Center lab-grown diamond | $ |
| Left side lab-grown diamond | $ |
| Right side lab-grown diamond | $ |
| Base setting | $ |
| Metal or metal upgrade | $ |
| Pavé, hidden halo, or other accents | $ |
| CAD, model, or custom-design labor | $ |
| Labor for externally sourced stones | $ |
| Initial sizing | $ |
| Taxes | $ |
| Insured shipping | $ |
| Appraisal or finished-ring documentation | $ |
| Included aftercare or inspections | $ |
| Complete payable total | $ |
In the supplied August 2026 evidence snapshot, Plum Diamonds displayed starting prices from $1,540+ for a three-stone oval design to $3,540+ for an oval three-stone trellis design. The plus signs and configurable process indicate that the final cost depends on the selected design and diamonds; the figures should not be treated as universal complete-ring prices (Plum Diamonds’ three-stone collection).
The same August 2026 evidence showed Helzberg listing two-carat-total lab-grown oval and emerald-cut three-stone rings at $3,499. These were merchant-listed product prices, subject to changes in inventory, size, configuration, and promotions (Helzberg’s three-stone listings).
Ritani displayed seven three-stone settings from $2,138 to $3,683 in the supplied August 2026 evidence. Those figures appeared to be setting prices, with the final ring cost dependent on selected diamonds, side stones, and metal. They should not be compared directly with a merchant’s complete preset-ring price (Ritani’s three-stone settings).
These observations do not establish a general market range. The examples involve different diamonds, metals, documentation, side-stone arrangements, seller services, and price inclusions. Verify listings immediately before purchase.
The distribution of weight can also change the price. One three-carat diamond is not priced by simply multiplying the price of a one-carat diamond by three. Likewise, three smaller diamonds totaling three carats need not cost the same as one three-carat diamond. Shape, grade, cut, dimensions, availability, documentation, matching labor, and setting complexity all contribute. Dividing the weight may reduce loose-diamond cost in some comparisons, but a three-stone ring also requires two additional diamonds to be sourced, matched, and set. Savings are not guaranteed (Peter Norman’s discussion of single-stone and three-stone carat pricing).
Ask the seller to state both total carat weight and center-stone weight. A quote that says only “3 ct ring” is incomplete unless it specifies whether three carats refers to the center or all included diamonds.
Compare policies alongside price. A lower quote may carry restricted returns, limited resizing, no assembled-stone approval, or additional charges for future work. Those terms do not automatically make it a poor purchase, but they belong in the comparison.
Use a pre-purchase checklist for the ring, seller, and custom process
Before paying a deposit or placing an order, create a written record of the final configuration. Screenshots can help, but the order confirmation, specification sheet, invoice, and seller correspondence should state what is actually being purchased.
Diamond identity and origin
- Confirm that the center, left side, and right side diamonds are all lab-grown.
- Ask what reports, invoice language, or supplier documentation support that disclosure.
- Record each report number when an individual report exists.
- Verify that any report or inscription belongs to the stone being supplied.
- Do not infer side-stone origin from a lab-grown center option.
Weights and measurements
Record for every diamond:
- Individual carat weight
- Length, width, and depth in millimeters
- Shape
- Length-to-width ratio where relevant
- Orientation in the setting
Also obtain the estimated finished across-finger span. If the seller provides only total carat weight, request the missing individual measurements before approval.
Visual matching
Request the center and side stones’ represented color and clarity information, but inspect the trio together. Look for consistent visible color, compatible outlines, balanced side-stone dimensions, and a coherent overall response to light.
For mixed shapes, do not expect identical facet behavior. Instead, check that one side does not appear persistently darker or hazier than the other and that the center retains the intended emphasis.
Custom approval sequence
A custom order should have defined approval stages. A useful sequence is:
- Approve the center diamond.
- Approve the side-stone pair.
- Review assembled-stone images or video.
- Approve the total span and stone angles.
- Review top, side, and end-on CAD views.
- Confirm prong number and placement.
- Confirm profile height and gallery access.
- Check wedding-band clearance.
- Approve the metal, finish, engraving, and ring size.
- Receive a final itemized quote before production.
Ask whether CAD approval makes the order noncancelable, whether revisions incur fees, and what tolerances the jeweler considers normal between a rendering and the cast or handmade ring.
Independently purchased diamonds
If you intend to supply one or more diamonds, ask whether the jeweler accepts outside stones. Obtain written answers to these questions:
- Who inspects the diamonds before setting?
- Can the jeweler reject a stone because of its condition or edge placement?
- Who assumes liability while the diamonds are in the jeweler’s possession?
- What happens if a stone is damaged during setting?
- Are setting fees or insurance charges different for outside stones?
- Will the jeweler document the stones upon receipt?
Do not ship loose diamonds until responsibility and insured transit have been addressed in writing.
Complete cost
The final quote should state whether it includes:
- The setting
- All three primary diamonds
- Pavé or hidden accent diamonds
- Metal upgrades
- CAD and custom labor
- Sizing
- Taxes
- Insured shipping
- Documentation or appraisal
- Future inspections or service
If the order requires a deposit, confirm the balance, due date, and point at which the deposit becomes nonrefundable.
Returns, cancellation, and changes
Check the policy for the exact buying route. Ready-to-ship, configured, made-to-order, and fully custom rings may have different return and cancellation terms.
Ask:
- Is the deposit refundable?
- When does the order become noncancelable?
- Does resizing make the ring final sale?
- Can a configured ring be returned?
- Are engraving or custom-metal choices excluded?
- What happens if the finished ring differs materially from the approved specifications?
- How long is the delivery-inspection period?
Do not rely only on a general return banner. Save the policy that applies to the actual order and ask the seller to resolve ambiguities in writing.
Resizing, maintenance, and replacement
Confirm the practical resizing range for the chosen ring rather than relying on a general store policy. Ask whether pavé, mixed metals, engraving, or side-stone spread affects future work.
Clarify what the warranty covers and excludes, including:
- Routine setting inspections
- Tightening or rebuilding prongs
- Replacing a lost side diamond
- Matching a replacement to the surviving stones
- Pavé repair
- Insured shipping for service
- Work performed by another jeweler
Ask whether the jeweler keeps the original dimensions and specifications on file and what process applies if an exact visual match cannot be sourced.
For routine care, follow the maker’s instructions for the specific setting. Common guidance includes mild soap, lukewarm water, and a soft brush, followed by careful rinsing and drying with a lint-free cloth. Store the ring separately so it does not rub against other jewelry. Arrange professional inspections according to wear, setting style, and the jeweler’s assessment rather than assuming one universal interval.
Final red flags
Pause before ordering if:
- Side-stone origin is unspecified.
- Individual dimensions are unavailable.
- “Total carat” language is ambiguous.
- The seller will not show the assembled trio.
- The finished across-finger span is unknown.
- Only top-down views are supplied for a custom setting.
- Wedding-band clearance is promised without a profile view.
- Price inclusions remain unclear.
- Return, cancellation, warranty, or liability promises are verbal only.
The strongest purchase is not necessarily the ring with the highest total carat weight. Choose the complete composition: exact dimensions, visible matching, documented lab-grown origin, an appropriate setting profile, known wedding-band clearance, and a complete itemized price backed by written policies.
Can all three diamonds in a three-stone ring be lab-grown?
Yes. A three-stone ring can contain a lab-grown center and two lab-grown side diamonds. Some collections and configurators establish only that the center can be lab-grown, so request written confirmation covering the center, left side, and right side stones.
What is a good center-to-side-stone ratio?
One jeweler-authored framework places approximately 60%–75% of total weight in the center and approximately 10%–20% in each side, with the chosen percentages totaling about 100% (Nekta New York). Another suggests that each side may weigh approximately 40%–60% as much as the center (SGL).
Both are flexible starting points. Use millimeter dimensions, shapes, setting angles, and the intended visual hierarchy to make the final decision.
Does three carats total look like one three-carat center diamond?
No. A 1.50 ct center with two 0.75 ct sides totals 3.00 carats, but the focal diamond remains a 1.50 ct stone. It may create broader coverage than a solitaire without producing the face-up appearance of one three-carat center (Peter Norman’s three-carat ring guide).
Always distinguish center-stone weight from total carat weight, then compare actual millimeter dimensions.
Does every lab-grown diamond in the ring need its own grading report?
Not necessarily. A center diamond may have an individual report while smaller side diamonds are supplied as a matched pair without separate reports.
Ask the seller to document the side stones’ lab-grown origin, individual or combined weights, dimensions, and represented color and clarity.
Is a prong or bezel setting better for a three-stone ring?
Neither is universally better. Prongs leave more of each diamond and its edges exposed. Bezels surround more of the edges with metal and generally provide greater edge protection, but they create a more metal-defined outline (La Joya Jewelry’s setting guide).
Choose by considering daily activities, desired appearance, profile height, cleaning access, comfort, and wedding-band fit. Inspect the specific design from the side rather than relying on the setting label alone.