
Three Stone Ring Proportions: How to Size Side Stones
Start with 0.25–0.30 of center weight per side for a center-focused look, 0.30–0.50 for balance, or 0.50+ for bolder coverage.
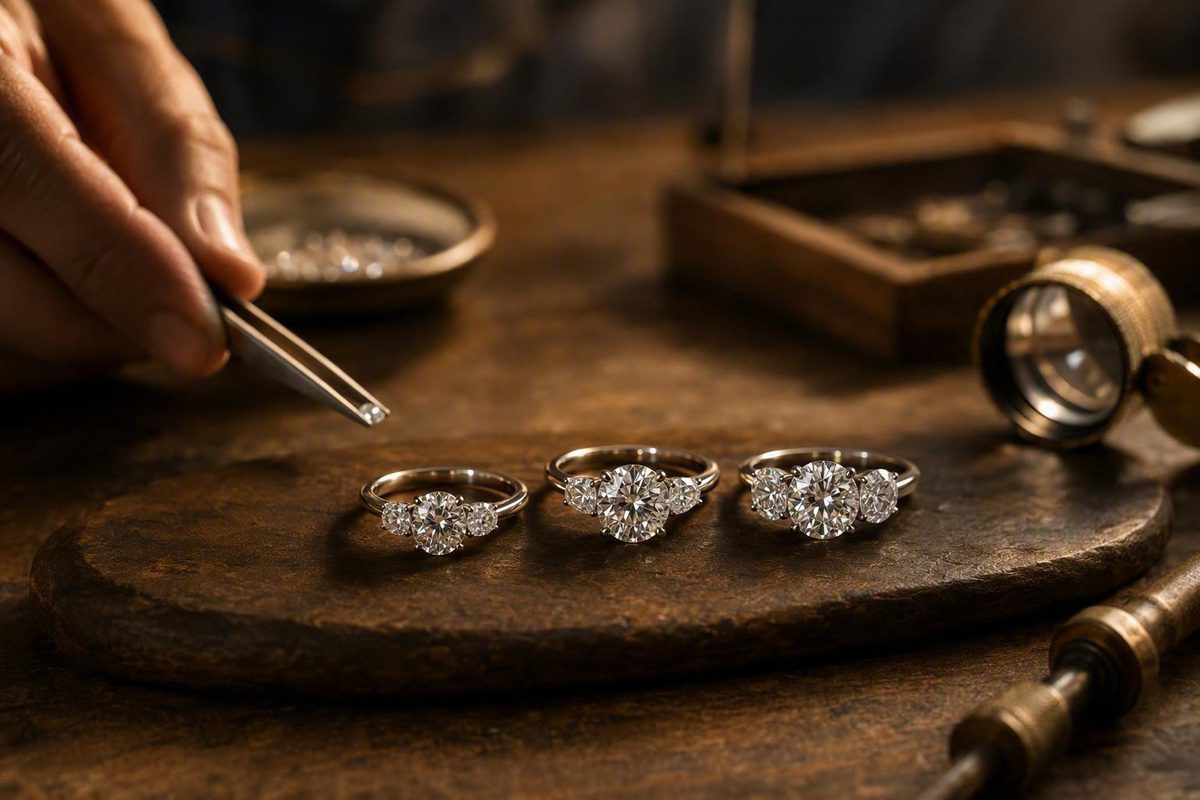
The short answer: start with a look, not a universal ratio
Start by deciding whether you want the center to stand apart, all three stones to feel balanced, or the composition to create nearly continuous coverage across the finger.
Throughout this guide, ratios use C:S:S notation:
- C = center stone
- S = one side stone
- S = the other side stone
Every ratio should also identify what it measures. For example:
- 1.00:0.30:0.30 by carat weight
- 1.00:0.70:0.70 by face-up width
Without that label, a ratio is incomplete.
As a cautious carat-weight screening framework, consider approximately 0.25–0.30 carat per side for every 1.00 carat in the center when you want a center-focused look; approximately 0.30–0.50 per side for a more balanced look; 0.50 or more per side for a bolder look; and 1.00 per side for three equal-weight stones. These are subjective design categories, not guaranteed visual outcomes or engineering specifications. Retailer MollyJewelryUS presents these ranges as starting points and emphasizes that shape, measurements, and setting design can materially change the result (MollyJewelryUS proportion guide).
| Desired look | Each-side carat ratio | Example C:S:S by carat weight | Likely visual effect |
|---|---|---|---|
| Center-focused | 0.25–0.30 | 1.00:0.25:0.25 to 1.00:0.30:0.30 | Clearly distinct center with noticeable accents |
| More balanced | 0.30–0.50 | 1.00:0.30:0.30 to 1.00:0.50:0.50 | Stronger side presence while usually retaining a focal center |
| Bold | 0.50 or more | 1.00:0.50:0.50 and above | Broad coverage and less visual separation among the stones |
| Equal-stone | 1.00 | 1.00:1.00:1.00 | Uniform three-stone composition |
The labels in the first column describe intended effects, not measurable quality grades. One person’s “balanced” may be another person’s “too center-heavy.”
In general, smaller sides preserve a distinct hierarchy: center first, accents second. As the sides grow, the ring reads more as one broad composition. Equal-size stones can create a uniform row rather than a center-with-accents effect.
That distinction is more useful than asking for the “ideal” percentage. Published commercial guidance illustrates the inconsistency. One retailer discusses sides between one-third and one-half of the center’s “size,” without clearly defining whether size means weight or visible dimensions (Brilliance sizing guide). Other commercial guides use roughly 60% or 70% while likewise leaving the measurement basis unclear. Do not average those recommendations; inspect what is actually being measured.
What a three-stone ratio actually measures
“Two-to-one” sounds precise, but it can describe several different comparisons. Before comparing designs or requesting quotes, separate these four concepts.
1. Center-to-each-side carat ratio
This compares the weight of each individual side stone with the center.
A ring described as 1.00:0.50:0.50 by carat weight has:
- one center stone at the reference weight of 1.00;
- one side stone weighing 50% as much as the center;
- a second side stone also weighing 50% as much as the center.
If the center weighs 1.00 carat, the sides weigh 0.50 carat each.
2. Combined side-stone weight
The same 1.00:0.50:0.50 by carat weight combination has two side stones whose combined weight equals the center’s weight:
0.50 + 0.50 = 1.00
This is where casual shorthand becomes confusing. Someone may say “the sides equal the center” while meaning both sides together. Someone else may say “50% sides” while meaning each side individually.
Use full C:S:S notation whenever possible. If you must use two numbers, write either:
- center:each side = 1.00:0.50 by carat weight, or
- center:combined sides = 1.00:1.00 by carat weight.
3. Side-to-center linear width ratio
This compares visible face-up width rather than weight. If the center is 7.50 mm wide and each side is 5.25 mm wide, each side is:
5.25 ÷ 7.50 = 0.70
The ring is therefore 1.00:0.70:0.70 by face-up width, or 70% per side by width.
This does not mean each side weighs 70% as much as the center. Carat is a unit of weight, not a visible-width measurement. Because a gemstone has three dimensions, linear width does not change in direct proportion to weight.
4. Total face-up span
Total span describes the complete composition across the finger. It includes the center’s width, the visible horizontal contribution of both side stones, and the effects of gaps, overlap, tilt, prongs, bezels, and other metal.
It is not the sum of the three carat weights. It may also differ from the sum of the stones’ maximum widths because the mounting can change how much of each outline contributes to the top view.
The need for explicit labels is not theoretical. Nekta New York, for example, discusses 1:0.5 and 70% proportions without defining whether “size” means carat weight, width, area, or another measure (Nekta New York proportion discussion). A percentage without a measurement basis is not a sufficient specification for ordering stones.
Terminology box
Clear: “50% per side by carat weight” Clear: “78% per side by average diameter” Clear: “The two sides together weigh the same as the center” Clear: “Estimated total face-up span is 17 mm before setting adjustments”
Ambiguous: “The sides are half size” Ambiguous: “Use a 2:1 ratio” Ambiguous: “The classic proportion is 60%”
Face-up area is another possible comparison, but do not substitute width for area. A linear ratio, area ratio, and weight ratio answer different questions.
How to calculate proportions from millimeter measurements
If you have grading reports or loose-stone dimensions, you can calculate a face-up linear ratio directly.
For stones where one relevant face-up width is meaningful:
Side-to-center width ratio (\%) = side-stone face-up width ÷ center-stone face-up width × 100
For a near-round stone with two slightly different report measurements, estimate average diameter as:
Average diameter = north–south measurement + east–west measurement ÷ 2
Worked round-diamond example
Suppose a round center measures 7.43 × 7.47 mm.
(7.43 + 7.47) ÷ 2 = 7.45 mm
Now suppose each round side has an average diameter of 5.80 mm.
5.80 ÷ 7.45 = 0.7785
Rounded sensibly, each side is about 0.78 of the center’s diameter, or 78% per side by average diameter. The source presenting these measurements appears to contain a percentage-notation error: the figures yield approximately 0.78, or 78%, not 0.77% (Brian Gavin Diamonds’ worked ratio example).
In the same example, the center weighs 1.551 carats and a side weighs approximately 0.75 carat:
0.75 ÷ 1.551 ≈ 0.48
The same side stone is therefore approximately:
- 48% per side by carat weight, but
- 78% per side by average diameter.
There is no contradiction. The first figure compares three-dimensional mass; the second compares one visible linear dimension. A stone weighing about half as much as another does not generally have half its diameter.
The source also discusses approximately 0.30-carat round sides producing a diameter ratio around 58% beside the roughly 1.55-carat round center. Again, the visible-width percentage is substantially larger than the carat-weight percentage.
These are round-diamond examples, not universal conversion formulas. Do not infer that every 0.75-carat stone measures 5.80 mm, that every 0.30-carat stone produces a 58% ratio, or that the same method adequately describes an oval, pear, emerald cut, or trillion. Exact dimensions vary, and other shapes require attention to the width that actually frames the center.
Which measurement should you use?
For three near-round stones facing straight upward, average diameter is a practical comparison. For elongated or mixed shapes, ask more specific questions:
- What is the side stone’s width where it visually meets the center?
- How much horizontal width is visible in the proposed orientation?
- Does its longest axis run across the finger or away from it?
- Does the outline taper toward the shank?
- How do the three outlines interact in a scaled top view?
The most useful measurement is the one that predicts the visible transition—not necessarily the stone’s longest report dimension.
Worked carat examples—and their limits
Carat ranges are useful for creating a shortlist. They are poor final specifications because stones with equal weight may have different outlines, depths, and face-up dimensions.
The following table applies the introductory per-side screening framework arithmetically to several center weights. It is a starting-point table, not a prescription; every row still requires inspection of the actual millimeter measurements.
| Center weight | Center-focused sides, each | Moderate sides, each | Bold sides, each | Required next step |
|---|---|---|---|---|
| 1.00 ct | 0.25–0.30 ct | 0.30–0.40 ct | About 0.50 ct or more | Inspect actual millimeters |
| 1.50 ct | About 0.38–0.45 ct | About 0.45–0.75 ct | About 0.75 ct or more | Inspect actual millimeters |
| 2.00 ct | About 0.50–0.60 ct | About 0.60–1.00 ct | About 1.00 ct or more | Inspect actual millimeters |
| 2.50 ct | About 0.63–0.75 ct | About 0.75–1.25 ct | About 1.25 ct or more | Inspect actual millimeters |
| 3.00 ct | About 0.75–0.90 ct | About 0.90–1.50 ct | About 1.50 ct or more | Inspect actual millimeters |
| 4.00 ct | About 1.00–1.20 ct | About 1.20–2.00 ct | About 2.00 ct or more | Inspect actual millimeters |
These figures are arithmetic extensions of the cited 0.25–0.30, 0.30–0.50, and 0.50-or-more framework—not carat-to-millimeter conversions. At larger weights, the nominal range may be impractical for a particular finger, shape, or setting. Total span can rule out a combination even when its carat ratio sounds reasonable.
A design-specific schedule: “The Megan”
Brian Gavin Diamonds publishes the following suggested combinations for a setting called “The Megan” (Brian Gavin Diamonds three-stone setting catalog):
| Center stone | Each side stone | C:S:S by carat weight |
|---|---|---|
| 1.00 ct | 0.20 ct | 1.00:0.20:0.20 |
| 1.25 ct | 0.25 ct | 1.00:0.20:0.20 |
| 1.50–1.80 ct | 0.30 ct | 1.00:0.20:0.20 to 1.00:0.17:0.17 |
| 2.00–2.80 ct | 0.40 ct | 1.00:0.20:0.20 to 1.00:0.14:0.14 |
| 3.00–4.00 ct | 0.60–0.70 ct | Approximately 1.00:0.15–0.23 per side |
This schedule applies to one named design, not three-stone rings generally. It creates relatively center-dominant combinations, particularly toward the upper end of each center-weight band. The same catalog contains other structures and side-stone forms, further demonstrating why a setting-specific schedule should not be treated as an industry formula.
For every row, inspect actual millimeters. A mounting must be evaluated against the dimensions of the selected stones, not merely their carat labels.
A 2.20-carat center: three very different directions
A PriceScope consumer discussion about a proposed 2.20-carat center illustrates how widely preferences can differ:
- Around 0.30 carat per side: small accents with strong center emphasis
- Around 0.80 carat per side: substantial sides and greater finger coverage
- Around 1.20 carats per side: a broad, high-impact composition with much less center isolation
Participants did not agree on one correct answer, and the examples were anecdotal rather than controlled comparisons. Their value lies in showing the range of preferences and the recurring importance of diameter, finger size, side-stone angle, and trying comparable rings on the intended hand (PriceScope discussion of a 2.20-carat center).
Do not buy “0.80-carat sides” from that description alone. Compare their measured widths, outlines, depths, and fit with the proposed center and mounting.
Adjust the ratio for stone shape
A numerical ratio cannot describe how an outline behaves visually. Matching shapes tend to create continuity because their curves, corners, and faceting styles repeat. Mixed shapes create contrast, which can be attractive but requires more deliberate coordination.
Think about side-stone shapes according to how they transition from the center toward the band.
Rounded transitions: rounds and half-moons
Round sides create a rounded step away from the center. With another round, they can read as one family of shapes. Beside an oval, cushion, or rectangular center, they introduce softer contrast.
Half-moons offer a curved profile and are discussed aesthetically as an option beside oval centers. Their balance depends on the curve, straight edge, orientation, and exposed width—not merely weight.
Tapered or elongated transitions: pears and marquises
Pear sides can narrow toward the shank, especially when their points face outward. Reversing the orientation changes the visual direction and the relationship between the sides and center.
Marquise sides can extend the layout laterally or diagonally, depending on orientation. Their length may contribute strongly to the overall span even when the width beside the center is modest.
These are aesthetic observations, not universal pairing rules. Gabriel & Co.’s commercial shape guide likewise presents matching shapes as cohesive and mixed shapes as contrasting, while describing outward-facing pear points and elongated side shapes as design choices rather than objective requirements (Gabriel & Co. side-stone shape guide).
Architectural transitions: baguettes, emerald cuts, and trapezoids
Baguettes and emerald-cut sides introduce straight lines and geometric steps. Tapered baguettes and trapezoids can narrow toward the shank, visually mediating between a wider center and a narrower band.
For these shapes, maximum length or average diameter may be the wrong comparison. Examine the edge nearest the center, the visible horizontal projection, and the taper. A relatively low-weight stone may still add substantial lateral reach.
Angular spread: trillions
Trillions create a triangular transition. Depending on orientation, a broad edge may face the center while the outer point directs the eye toward the band. Their visible spread cannot be predicted reliably from a round-diamond diameter ratio.
Use scaled top views for mixed shapes
For any mixed or elongated combination, prepare a top-view drawing using the exact length and width of all three stones. Include orientation. Two candidates with the same carat weight may differ in:
- maximum length;
- maximum width;
- width beside the center;
- taper;
- corner shape;
- visible area;
- horizontal projection in the proposed setting.
A ratio can narrow the candidates, but the scaled layout reveals whether the outlines work together.
Measure the whole composition across the finger
A three-stone ring is viewed as one horizontal arrangement, not three isolated grading reports. The visible composition includes:
- center-stone width;
- exposed width of the left side stone;
- exposed width of the right side stone;
- gaps or overlap;
- prongs or bezel rims;
- side-stone tilt;
- transition into the shank.
Increasing side-stone size generally increases finger coverage. It can also reduce the visual separation of the center as the three outlines become closer in scale.
The same loose stones can appear delicate, balanced, or crowded depending on the hand, desired coverage, setting geometry, and side-stone angle. Ring size alone cannot produce a dependable “correct span,” because the evidence provides no validated equation linking one ring size to one required total width.
A bounded planning estimate
For an initial estimate:
Estimated span ≈ center face-up width + visible left-side horizontal width + visible right-side horizontal width
Treat this as a planning estimate, not a manufacturing formula. Ask the jeweler to evaluate how the proposed setting’s tilt, overlap, gaps, prongs, bezels, and stone positions alter the finished span.
Frank Darling’s commercial design discussion similarly advises considering the combined width of all three stones in relation to finger size and desired coverage, while noting that larger combinations may create fit constraints (Frank Darling three-stone design discussion).
Preview the span on the intended hand
Useful checks include:
- a scaled top-view printout placed over the intended finger;
- a digital rendering displayed at true scale;
- loose stones arranged in a temporary holder;
- an in-person ring with measured dimensions close to the proposal.
When comparing reference rings, obtain their actual stone dimensions and ring size where possible.
Consumer examples show materially different preferences even for the same center weight. That does not prove any combination is correct; it shows why hand-specific viewing matters.
How the setting changes apparent proportion and fit
The setting determines how much of each stone edge is visible, where the stones sit relative to one another, and how the engagement ring interacts with a wedding band.
Prongs and bezels alter the outline
Prongs hold stones at selected points and leave much of the perimeter visible. A bezel surrounds more of the edge with metal. Visually:
- prongs preserve more of the loose stone’s uninterrupted outline;
- bezels add a metal boundary around the stone;
- prong placement can separate or connect adjacent outlines visually;
- bezel rims contribute to apparent span even though they are not part of the gemstone.
This is a visual comparison, not a universal ranking of brilliance, durability, or performance.
Structure controls position
Common structural approaches include:
- Trellis: supports cross or weave beneath and between stones.
- Basket: each stone sits in a supporting framework or head.
- Cathedral: raised shoulders rise toward the center assembly.
- Open gallery: open space beneath the stones can provide cleaning access.
- Half-bezel: metal covers selected parts of the perimeter rather than enclosing the entire edge.
These categories can overlap. A ring may combine a cathedral profile with baskets or use trellis-like supports with an open gallery.
Center height, side height, tilt, gaps, and prong locations all affect the transition among the stones.
Always inspect the profile for wedding-band fit
Whether a wedding band sits flush is primarily a profile-view question. A basket or projecting side-stone structure may obstruct the band and create a gap. Setting height is one of the factors that affects compatibility, while an open gallery can provide access beneath the stones for cleaning (La Joya Jewelry setting guide).
Treat those as design considerations to verify in the actual ring, not guarantees attached to a setting-style label. If a flush fit is required, provide the intended wedding band—or its exact height, width, profile, and projecting details—and request a side-view CAD showing both rings together.
A setting described as customizable should not be assumed to accept every stone combination. Before purchase or modification, ask the jeweler to assess the exact length, width, and depth of all three stones against the proposed mounting. Brian Gavin Diamonds, for example, describes its trellis setting as custom-made for the selected combination of diamond sizes, illustrating why compatibility is combination-specific rather than automatic (Brian Gavin Diamonds ratio and setting example).
A step-by-step method for choosing the final proportions
Step 1: Choose the intended effect
Select one working brief:
- Center-focused: the middle stone should be immediately distinct.
- Balanced: the sides should have meaningful presence while preserving a focal center.
- Bold: the ring should emphasize broad three-stone coverage.
- Equal-stone: all three stones should read as peers.
These are design directions, not grades. Save reference images, but annotate what you like: center separation, side taper, total coverage, low profile, or equal outlines.
Step 2: Record the center stone’s complete measurements
Do not stop at carat weight. Record:
- shape;
- length;
- width;
- depth;
- orientation;
- outline details relevant to pairing;
- grading-report number, if applicable.
For an elongated center, define which dimension will run across the finger. For an unusual outline, use a top-view image or tracing in addition to report measurements.
Step 3: Select an initial per-side carat range
Use carat weight only as a screening tool. The cited framework supports beginning around:
- 0.25–0.30 per side relative to the center for center-focused;
- 0.30–0.50 per side for balanced;
- 0.50 or more per side for bold;
- 1.00 per side for equal-weight stones.
These figures create a search range; they do not approve the stones. The underlying ranges are retailer guidance rather than an industry standard (MollyJewelryUS proportion guide).
Step 4: Compare relevant face-up widths
For near-round stones, calculate average diameters and the per-side linear ratio:
side average diameter ÷ center average diameter × 100
For mixed or elongated shapes, compare the widths that meet or visually frame the center and build a scaled layout. State the ratio basis explicitly in every note, quote, and approval document.
Step 5: Match the two sides to each other
The side stones should function as a pair. Compare:
- length, width, and depth;
- outline and taper;
- orientation;
- bilateral symmetry in the finished layout;
- color;
- clarity;
- general cut appearance;
- visible brightness and pattern in comparable lighting.
Equal carat weight alone does not create a visually matched pair. The practical goal is a coordinated pair in the intended mounting.
Step 6: Estimate total span and preview the top view
Calculate a first-pass span from the visible horizontal widths, then inspect one or more of the following:
- a scaled top-view drawing;
- a loose-stone arrangement;
- a CAD rendering;
- a wax or resin model;
- an in-person ring with similar measured dimensions.
View the composition on the intended hand, both straight on and at normal conversational distance—not only in magnified close-up.
Step 7: Review the profile
Inspect:
- center height;
- side-stone angle;
- gaps and overlap;
- prong or bezel coverage;
- access beneath the stones for cleaning;
- adjacent-finger comfort;
- wedding-band clearance.
If a flush band is mandatory, include the band in the CAD or physical fitting. Do not rely on labels such as “high profile,” “low profile,” or “flush fit” without checking the actual geometry.
Step 8: Obtain final setting approval
Before purchasing side stones or modifying an existing ring, ask the jeweler to confirm that the proposed mounting can accommodate the exact stones.
That review should use measured length, width, and depth rather than nominal carat weights. If the side stones are already owned, have the jeweler inspect them before finalizing the heads, baskets, bezels, prongs, and spacing.
Copy-ready jeweler handoff checklist
- [ ] Target visual effect: center-focused / balanced / bold / equal-stone
- [ ] Ratio basis: carat weight / face-up width / both
- [ ] Target C:S:S by carat weight: __ : _ : ___
- [ ] Target C:S:S by relevant face-up width: __ : _ : ___
- [ ] Center shape: ______
- [ ] Center dimensions, L × W × D: __ × _ × ___ mm
- [ ] Center orientation: ______
- [ ] Left side shape: ______
- [ ] Left side dimensions, L × W × D: __ × _ × ___ mm
- [ ] Left side orientation: ______
- [ ] Right side shape: ______
- [ ] Right side dimensions, L × W × D: __ × _ × ___ mm
- [ ] Right side orientation: ______
- [ ] Side-pair matching priorities: dimensions / outline / color / clarity / cut appearance / symmetry
- [ ] Target total top-view span: ______ mm, subject to CAD and setting adjustment
- [ ] Preferred setting structure: prong / bezel / half-bezel / basket / trellis / cathedral / open gallery
- [ ] Preferred center height: ______
- [ ] Preferred side angle or taper: ______
- [ ] Cleaning-access preference: ______
- [ ] Wedding band supplied or measured: yes / no
- [ ] Flush wedding-band fit required: yes / no
- [ ] Side-view CAD with wedding band required: yes / no
- [ ] Jeweler confirms exact stones fit the proposed setting: yes / pending
Frequently asked questions
What is the classic ratio for a three-stone ring?
There is no universally established classic ratio. Commercial guides and consumer discussions use “classic” or “balanced” for several different proportions, and some fail to specify whether their figures refer to carat weight or visible width.
A practical screening range is 1.00:0.30:0.30 to 1.00:0.50:0.50 by carat weight, depending on how distinct you want the center to remain. Then compare actual millimeter dimensions. Never approve a “classic” ratio until its measurement basis and per-side meaning are explicit.
Should each side stone be one-third or one-half the center stone?
Either can work if the basis is stated. By carat weight:
- One-third each: 1.00:0.33:0.33
- One-half each: 1.00:0.50:0.50
Consumer examples for a 1.00-carat center include approximately one-third-carat and half-carat sides, but the discussion treats these as personal design choices rather than a fixed formula (PriceScope discussion of side-stone sizing).
One-third-weight sides will generally preserve more center emphasis, while half-weight sides will generally create stronger side presence. Neither will necessarily look one-third or one-half as wide. Compare actual dimensions and scaled layouts rather than relying on the fractions alone.
Why does a half-carat-weight side stone look larger than half the center’s diameter?
Because carat measures three-dimensional weight, while diameter measures one linear dimension across the face. Halving weight does not usually halve width.
In the worked round example, a roughly 0.75-carat side is about 48% of a 1.551-carat center by weight, yet its 5.80 mm average diameter is about 78% of the center’s 7.45 mm average diameter. The weight ratio and diameter ratio describe different properties.
Can all three stones in a three-stone ring be the same size?
Yes. Express that as 1.00:1.00:1.00, specifying whether you mean equal carat weight, equal face-up width, or both.
Equal-size stones create a broad, uniform composition rather than a dominant center with accents. They also increase total span, so preview the arrangement on the intended hand and verify side-stone angle, adjacent-finger comfort, mounting capacity, and wedding-band fit. Equal weight does not necessarily produce perfectly equal visible dimensions.
How can I tell whether a three-stone ring will sit flush with a wedding band?
Inspect the ring in profile with the intended wedding band. The basket, gallery, side-stone supports, center height, and the band’s own profile determine whether the two rings meet or leave a gap.
Ask for a side-view CAD showing both rings together and using the exact dimensions of all three stones and the band. If the wedding band already exists, provide it to the jeweler for design and fitting. A setting category or “flush fit” description is not a substitute for checking the actual geometry.
A ratio is a screening tool, not the verdict. Define the desired visual effect, label every ratio by measurement type, compare the actual face-up dimensions of all three stones, assess the complete span on the intended finger, and have the jeweler verify setting and wedding-band compatibility before the stones are purchased or mounted.